I know the best way to train my body. But this knowledge took almost two decades to accumulate.
So when I look back on my first workout ever, I cringe.
There are so many things I would do differently. If I had known back then what I know today, I could have avoided a plethora of injuries along the way.
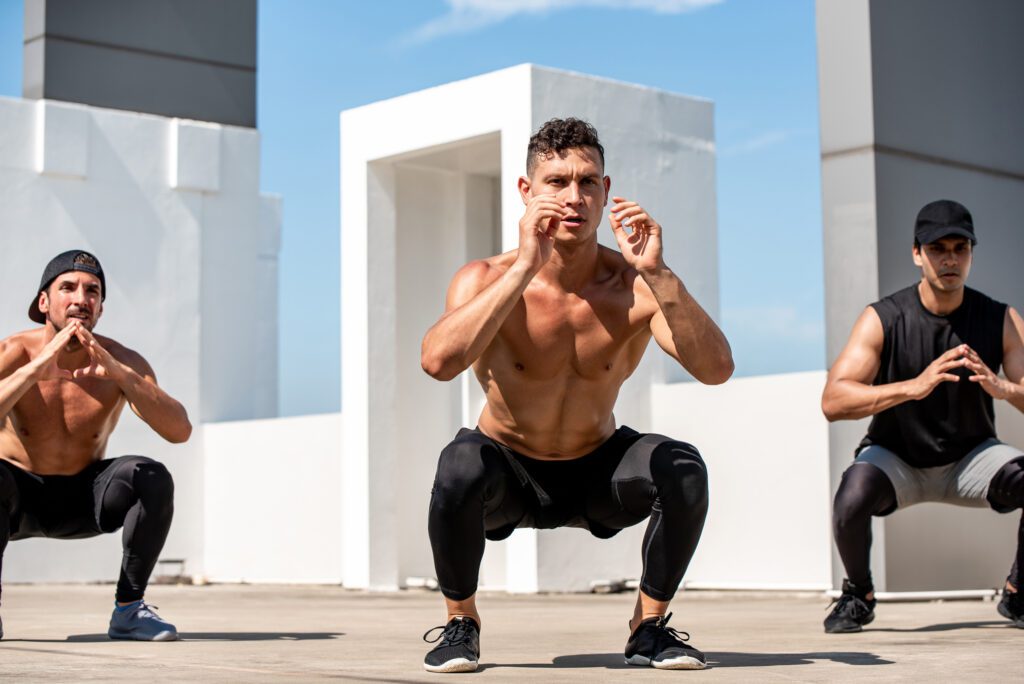
That’s why I’m sharing five specific exercises with you today. These are the key movements that should serve as the foundation upon which your general fitness is built.
1. Hip thrust
2. Goblet box squat
3. Dead-stop push-up
4. Step-up
5. Single-arm farmer’s walk
When choosing exercises, most guys want to build mucle, burn fat, boost metabolism, improve mobility and give you more energy. These exercises do just that.
But they’re also:
1. Functional. They best mimic and train you for the movements that you are most likely to use over the course of each day.
2. Accessible. They’re convenient exercises that you can do anytime, anywhere – especially at home or in a hotel.
3. Safe. They autocorrect your form and put your joints in the best positions for success, which is critically important if you’re training on your own without coaching supervision.
4. Progressive. They allow you to systematically and seamlessly increase (or decrease) the level of difficulty, whether you do it by adjusting the load or altering the exercise variation.
5. Transcendent. They make you better at just about everything else. It’s a global performance-enhancer and must be prioritised as such in your training.
And these moves are not just for guys new to working out or trying to get back in shape – they should remain staples in your training regimen until the day you die.
I do these in some way each week without fail. And so should you, starting today!
Click here for 3 superset workouts guaranteed to melt the fat around your midsection
The Hip Thrust
One of my all-time favourite sayings: “It’s all about the glutes!”
I don’t just say this because I’m as ass-man (and I am). I say it because it’s the truth. The hips drive every key athletic movement and house the biggest metabolic zone in your body.
There is no better exercise to develop your gluteal muscles than the hip thrust. It isolates the glutes and creates maximum activation at terminal hip extension, where you need it the most. Consider it the bench press for your butt.
You can’t talk about the hip thrust without mentioning the trainer who has popularised it, Bret Contreras. He’s even done studies to show that it better strengthens your glutes than squats and deadlifts.
I know, I know – it looks ridiculous. But so do your high school yearbook photos. And that doesn’t make them, or this exercise, any less special.
The fact remains that a humping movement seems to be the best way to build your butt and, as a result, improve your overall fitness.
There are multiple ways to apply it to your workout:
• Do 1-2 sets of 10-20 reps to warm up on leg days or when doing lower-body intensive exercises like squats, deadlifts, running or jumping.
• Start with just your bodyweight. Once you can do 5 sets of 20 reps in 10 minutes with ease, progress to a more advanced variation.
• The shoulders-elevated progression is ideal for full range of motion and max glutes activation. You can make the move harder by using barbell or band resistance, or by doing them on one leg a time. The barbell option provides the most strength and muscle gains. Shoot to be able to 5 sets of 10 with a load equal to your bodyweight.
• If you don’t have access to a barbell, you can load the exercise with a dumbbell or kettlebell. Or shoot for 5 sets of 10 reps per side of single-leg hip thrusts.
Click here for the glutes workout from hell
The Goblet Box Squat
For general fitness – which means you’re not a competitive powerlifter or weightlifter – the goblet box squat is king. Period.
They are about as functional as it gets – loaded standing to sitting to standing. They are easy on the back and knees, but hard on the glutes and core.
Sitting down on a box also standardises your squat depth. You can adjust the height of the box based on your mobility and injury history.
Front-loading the weight autocorrects your squatting form because it forces you to stay more upright and better load your hips and thighs.
You can progressively overload the move in small 2.5-kilogram increments. This micro-progression produces pain-free gains that last. It’s also a self-limiting exercise because you can only use a weight that you can actually pick up and hold.
Trust me when I say you’ll never be too good or too strong for this exercise. I’ve built up to doing this with a 75kg dumbbell – and they crush me.
Once you max out your dumbbell options, you can progress to doing them with a kettlebell (harder to hold) or bump up to the barbell front-loaded option.
Finally, goblet box squats improve posture and mobilise every key joint in your body. I can’t say enough about them. Please start doing them and please help me spread the good word.
There are multiple ways to apply it to your workout:
• Use a box height that ideally has your hip crease at or slightly beneath your knee crease.
• Do them at least once per week and up to three times per week. If you do them multiple times per week, use a mix of rep ranges and loads for maximum gains: light weight for 15-20-plus reps, medium weight for 8-12 reps, heavy weight for 3-5 reps.
• Do a set every minute for more fat loss and conditioning. Do a set every two minutes for more of a strength emphasis.
• Your goal is to be able to do multiple sets of 10 reps with a load that is ideally half your bodyweight.
• You can also progress to doing these on one leg at a time to develop superb single-leg strength and stability.
• Bonus tip: perform 100 bodyweight box squats on your off days to improve form and recovery.
The Dead-Stop Push-up
The dead-stop push-up is the Men’s Health-approved way to learn and test the push-up.
By stopping and resting at the bottom with your full body in contact with the floor, you eliminate the stretch reflex (or the slingshot-like quality of your muscles and connective tissues). This makes your muscles work way harder than usual.
Plus, it’s the best way I know of to teach you how to create total body tension from head to toe.
You must create tension in your thighs, hips and trunk to come up off of the ground otherwise your hips will sag and your body will collapse. Think of this like working on your planking in a much more fun and dynamic way than just planking.
But don’t just push up to the plank position at the top. I want you to push your hands through the floor and really, really round out your upper back.
This will fully activate your serratus anterior muscle (a key shoulder stabiliser) and also make your abs contract harder. Bonus!
Do dead-stops often and your push-up totals and bench press loads will go up – I guarantee it.
There are multiple ways to apply it to your workout:
• Do these with your feet blocked together. This allows you to squeeze your legs together to create more spinal stability.
• You can either plug this move into a circuit as an upper-body or core move, or do as many reps as you can in 10 minutes.
• Your goal is to be able to do 100 total reps in 10 minutes, which breaks down to 10 reps EMOM (every minute of the minute) for 10 straight minutes.
• Once you hit that goal, progress to doing these push-ups on one leg at a time, with your feet elevated onto a bench, or while wearing a weight vest.
• Add some power by pushing off the floor with your fingers and going airbourne. The clap is optional.
Click here for two push-up workouts that hit every muscle in your core
The Step-up
No program is complete without some dedicated single-leg work to strengthen weakness and imbalances between sides.
Unilateral exercises also serve as a foundation to locomotion, so if you want to be a good walker and runner (and you should), then you’ve got to put in the leg work.
I’d recommend starting with step-ups before lunges. Why? Because step-ups are easier on the knees and they teach you how to use your hips (remember how important the glutes are!).
Most guys are too knee-dominant as it is, focusing on movements that work only their quads. But step-ups will help build up your hips and hamstrings so they can keep up with your quads and prevent injury.
You can also easily scale the exercise by using different box heights based on your goals and fitness level.
Plus, it’s super functional. You’ll most likely encounter curbs, steps and staircases daily. (Side note: if you’re able and you take the escalator, elevator or especially the people movers at airports, you’re dead to me).
There are multiple ways to apply it to your workout:
• Most of the time, the ideal box height is one that allows your hip crease to be at or slightly below your knee crease.
• You want approximately three 90-degree angles formed – one at the ankle, one at the knee, and one at the hip – at the start and end of the movement.
• Start by mastering the eccentric – or lowering – portion of the exercise. Take at least 3-5 seconds to lower from the top to the bottom of the exercise. As you lower, focus on tracking your knee directly over your ankle/foot and really fight to prevent any sort of plopping at the bottom of the exercise because this is when your glutes needs to kick in the most.
• Using just your bodyweight, start or end your workout with 10 minutes of continuous alternating step-ups. This will build your base.
• Progress the movement by adding weight and building strength with sets of 5-10 reps per side while holding dumbbells.
The Single-Arm Farmer’s Walks
The simplicity of the farmer’s walk (also called carry) is probably its biggest enemy. It seems so basic that most people overlook it. But there’s nothing better.
Farmer’s walks build your grip, sculpt your shoulders and abs, and burn fat and build muscle from head to toe. I love doing them with weight(s) in both hands, but they’re even better done one side at a time.
That’s because asymmetrical-loading increases hip and abdominal activation and ultimately makes your body more symmetrical.
In addition, you can work continuously by switching sides as you fatigue. When you’re short on time and you want maximum conditioning benefits, the key is cutting out the rest.
And here’s where this move becomes even better. I’m less interested in you being able to hold a really heavy weight at your side, and more interested in you being able to hold a lighter weight overhead with your arm fully extended, biceps alongside your ear, abs crunched.
If you can do this pain-free without shrugging your shoulders, then you’ve demonstrated a level of mobility and stability that 99 out of 100 guys would dream of.
And this will boost performance on anything you do with your arms overhead, like pull-ups, chin-ups or jumping.
Start doing overhead single-arm carries. They will muscle up and mobilise your entire shoulder girdle and improve weaknesses everywhere. And it will upgrade the overall aesthetics of your entire upper body.
There are multiple ways to apply it to your workout:
• Start or end your workout with 10-minutes of non-stop single-arm carries, switching sides every 25-50 metres or each minute.
• Level 1: Use a 12.5kg dumbbell held at hip level by your side.
• Level 2: Use a 12.5kg dumbbell held in the “front rack” position at shoulder level.
• Level 3: Use a 12.5kg dumbbell held overhead with your arm fully extended.
• Spend at least a month at each level, milking the movement for everything it’s worth. Once Level 3 is a piece of low-carb cake, start gradually bumping up the load 2.5kg at a time using the same training format. A 25kg dumbbell is the goal. A 50kg dumbbell is the dream.
• Bonus tip: if you’re short on time, try doing your step-ups as mentioned in move #4 while holding a dumbbell in only one hand at a time. The overhead version is a life-changer.
Click here for strength tips from a man who lifts five times his bodyweight